On this page
Start here
Identify the insert and its permitted removal
Clean the insert separately from the basket with the permitted mild-soap and soft-sponge method. Inspect both accessible sides, then complete drying and account for its attached components before reinstalling it. A crisper plate is easy to overlook because it lives inside the basket. Locate it in the matching manual and read how it is meant to be removed. Check whether any attached feet, grips or seals stay in place during cleaning. Do not peel off a component merely because it looks removable. The correct care procedure should describe the actual insert supplied with your exact appliance, not a similar-looking accessory online.
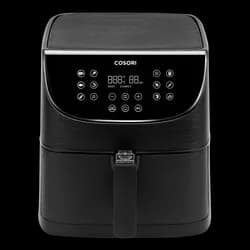
COSORI's Pro LE guidance treats the basket and crisper plate as separate cleaning items and recommends gentle tools. Keep that distinction in your routine. The basket can look clear while the insert remains unwashed, or the top of the plate can look tidy while its underside needs the approved cleaning method. Account for the whole owner-removable part rather than treating the visible cooking surface as the entire job.
Set the plate down without losing small parts
Prepare a place where the insert can rest without being buried under dishes. If the manual permits additional pieces to come off, keep them together and identifiable. A cold photograph can document their orientation before removal, while the actual reassembly still follows the instructions. This is particularly useful in shared kitchens where a second person might otherwise see loose pieces and assume they belong to another appliance.
Imagine cleaning after a coated-food meal in a small sink. The main basket is obvious, but the plate is leaning behind a saucepan and is forgotten. A simple change is to put the insert in its own clearly visible cleaning position. The improvement is organisational, not a new cleaning chemistry. The approved method remains the same, but the component now has an unmistakable place in the sequence.
Inspect both sides through the approved method
Use the prescribed washing and rinsing procedure, then inspect the accessible surfaces. Check holes or grooves as the manufacturer allows, without probing hidden assemblies or enlarging openings. If the cleaning tool cannot reach a spot comfortably, do not substitute a sharp pick by default. Ask whether the manual provides another approved step, and seek support when residue or damage remains uncertain.
Keep a surface problem separate from a missing-part problem. A worn or detached foot, a warped insert or a questionable coating needs model-specific advice even if the plate can still sit inside the drawer. Do not run the appliance to test an uncertain accessory fit. Record the condition and the exact component reference if available. A clean insert must also be accounted for and correctly assembled before it can be called ready.
Make reassembly part of completion
Follow the manual's drying and placement instructions and confirm the plate's orientation while the appliance is cold. If it is still drying, tell the next user where it is and that the appliance is not fully prepared. Avoid putting a damp or questionable insert back merely to make the kitchen look tidy. A clear ready-state message prevents the next cook from improvising with a missing component.
Review this care step whenever you add an approved replacement plate or another accessory. Similar dimensions do not establish identical installation or cleaning requirements. Keep the part identity in the household record and use the matching instructions. The practical goal is straightforward: the crisper plate should move through the same deliberate wash, inspection and reassembly process as the basket, instead of becoming an invisible exception beneath the food.
Behind this guide
Sources & editorial method
This guide combines original editorial decision support with the linked documentation. It is not a hands-on product test. Check the exact regional model and its manual before purchasing or using an appliance.
How we research and publish our guides